Super Mushroom
To understand the Super Mushroom, you first need to understand how the Super Mushroom came to be.
I thought of it in1995 as a way to get my PC opening quicker the moment it leaves my hand during stowed jumps.
NOTE: I use the Super Mushroom when going stowed from an object lower than 400 feet using a large PC.
With the REGULAR mushroom, the mesh is stretched out, squeezed together, and then S folded.
This usually works great, especially if you have at least 400 feet, so if you do not understand my
explanation below, stick with what you know and feel confident about. Handheld can be a good choice.
When going handheld I don't use the Super Mushroom.
When the regular mushroom leaves your hand, the mesh can stay waded up until you get bridle extension
and enough air molecules flowing into the collapsed mesh to get it to start to expand.
This can happen very quickly, or sometimes you get a hesitation. When the Super Mushroom leaves your
hand the PC begins to fall open (expand open) immediately which makes for a larger opening to start
catching more of those first molecules of air. The Super Mushroom has been very reliable; whereas
I have had hesitations with the regular mushroom. OK, here is the Super Mushroom pack job. If you find
it hard to understand the best thing is to find me BASE jumping somewhere and have me show it to you.
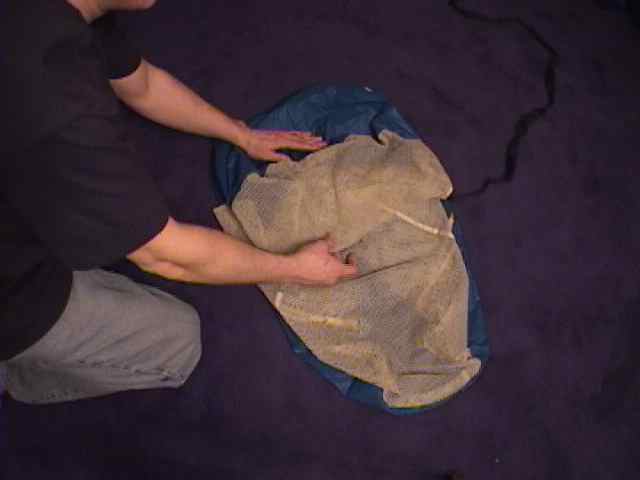
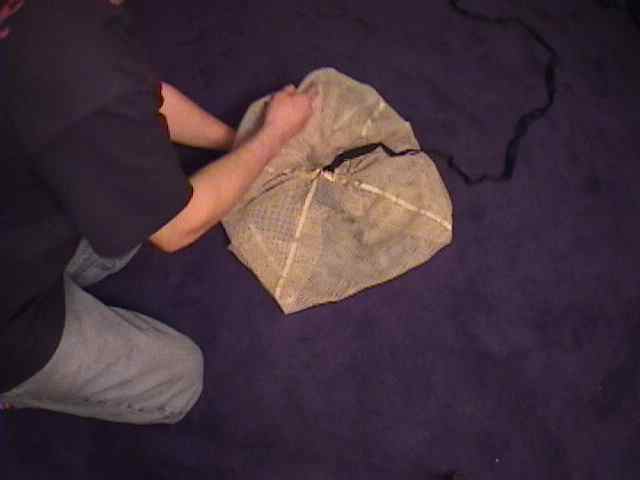
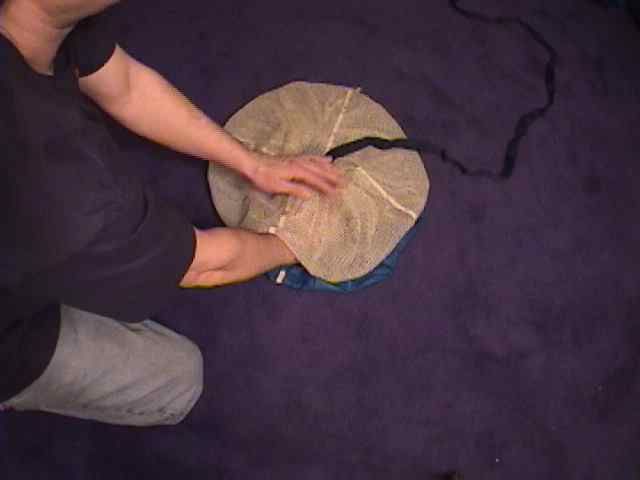
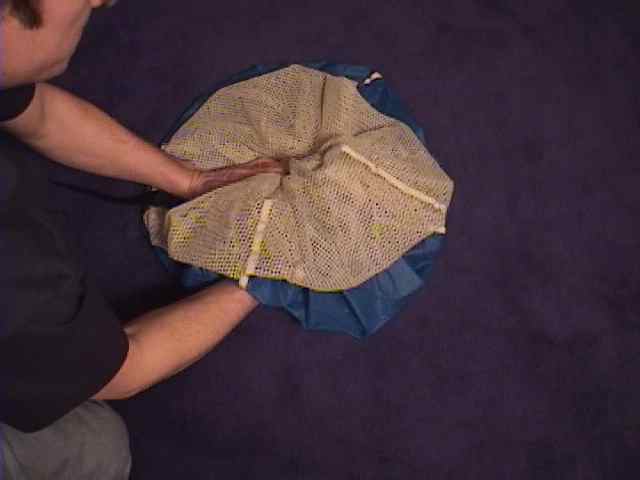
STEP 1 - Lay the PC flat on the ground, Rip-Stop facing down and mesh facing up.
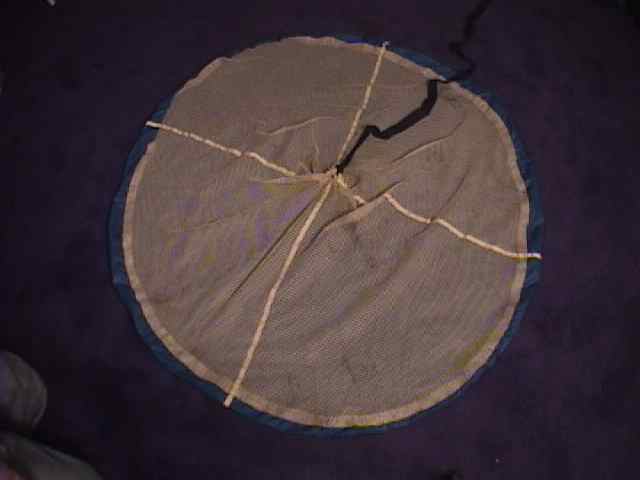
NOTE: To keep the center-line from knotting on itself, position it in a way to keep it from twisting or
laying on itself. I prefer a horseshoe shape off to one side. Do NOT use the Super
Mushroom on a PC with a handle inside as the center-line could hitch around the handle.
For me, the risk of having a hesitation with the regular mushroom scares me more than the remote chance
of anything weird happening with the center-line. By carefully positioning the center-line while packing the
Super Mushroom, I think the chances of anything weird happening with the center-line diminish.
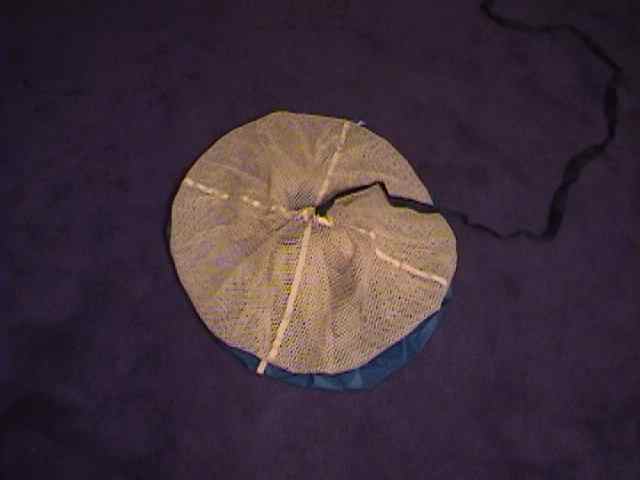
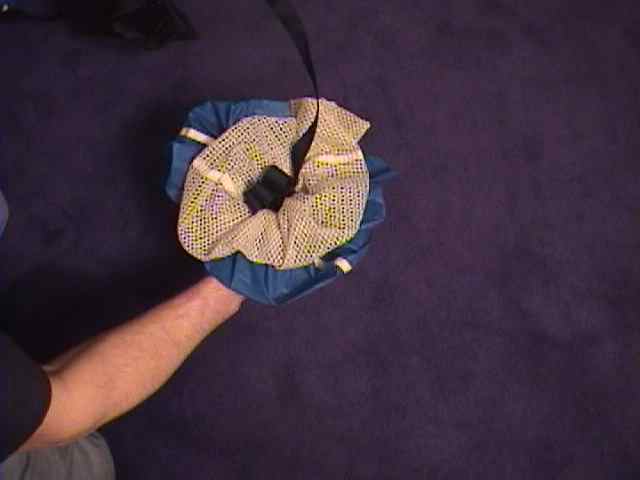
STEP 2 - Bring the outer circumference seam (the seam that holds the mesh to the Rip-Stop) into the center.
That is the tricky part. Do it in quarters and then bring the rest into the center .
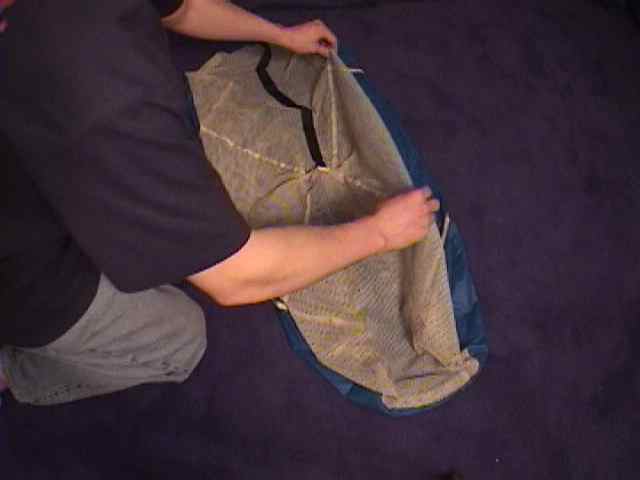
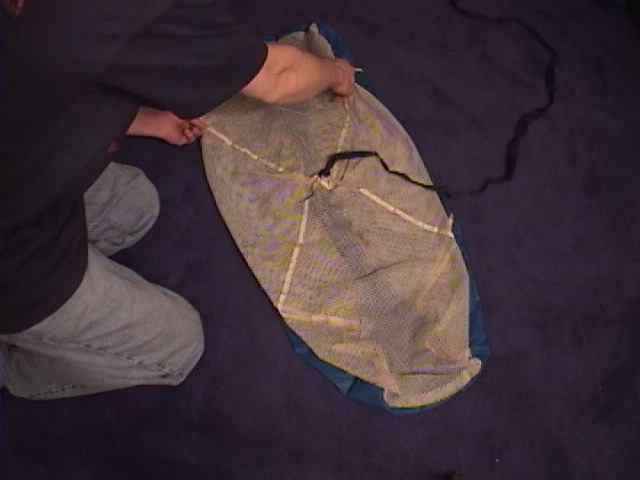

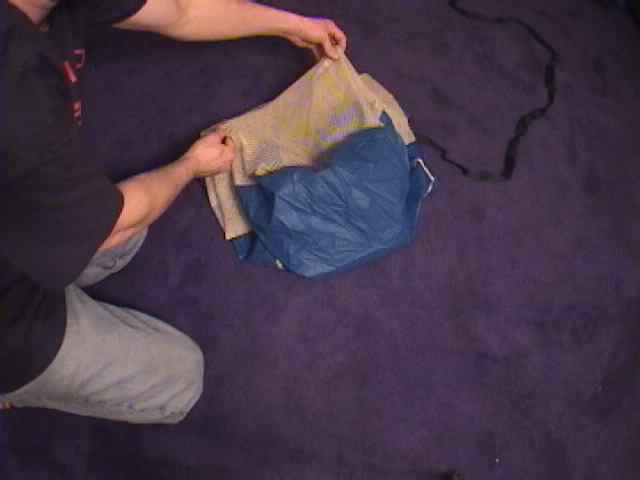
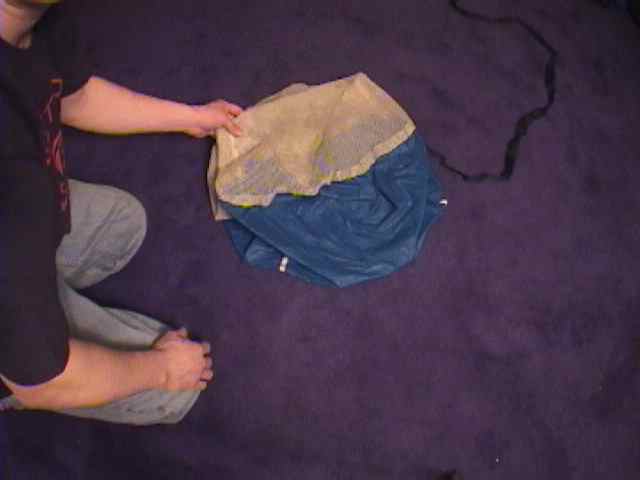
When you get this step done,
the Rip-Stop will puff out from the cap half way, then fold and go back in to the center where the circumference
seam is gathered. Likewise, the mesh will puff out from the gathered seam halfway, then fold over and go back
into the center where the bridle attaches. That describes the layers but the whole thing is still laying flat, mesh up.
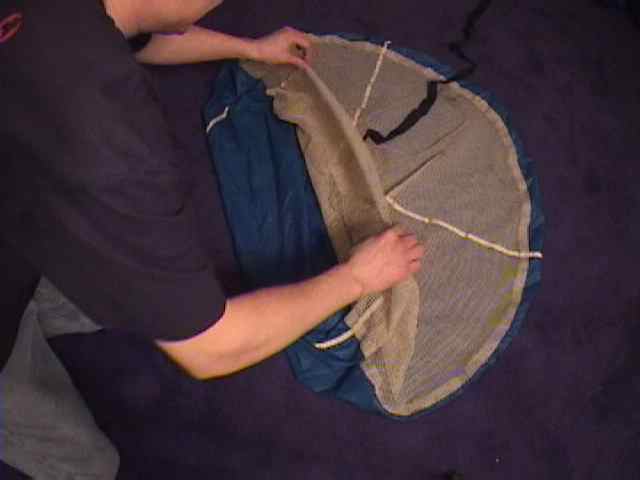
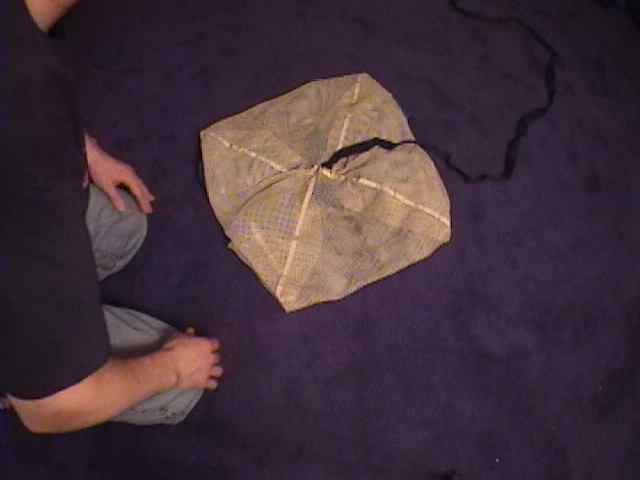
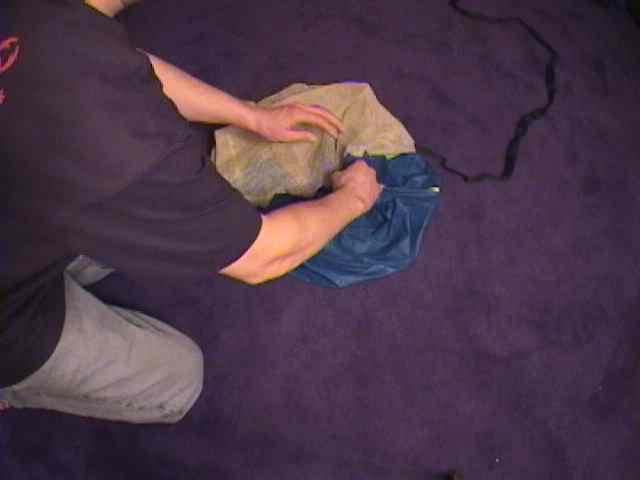
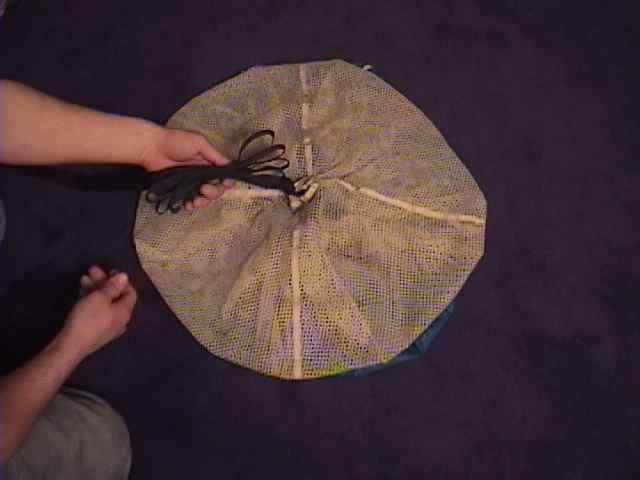
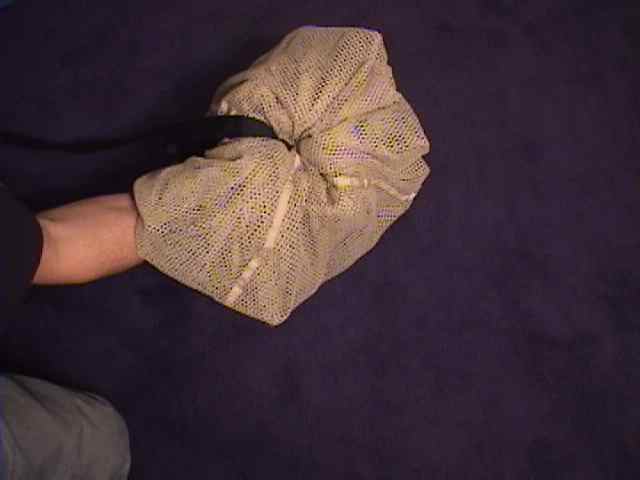
STEP 3 - Now s-fold the bridle. Each s-fold should be the radius of the new smaller circle of mesh.
That same radius is how long the finished cylinder will be, and yes it is kind of short.
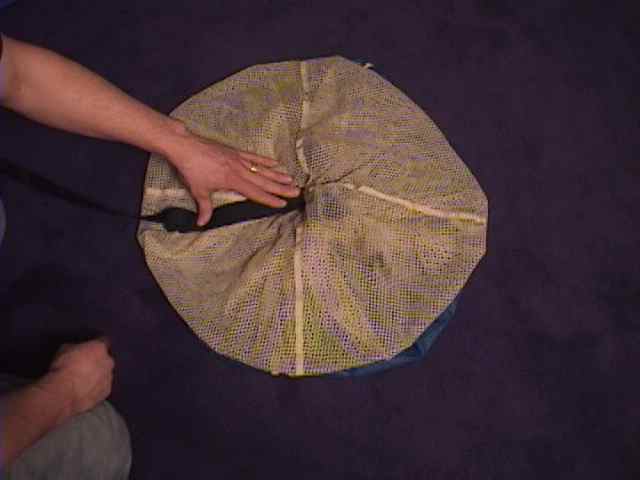
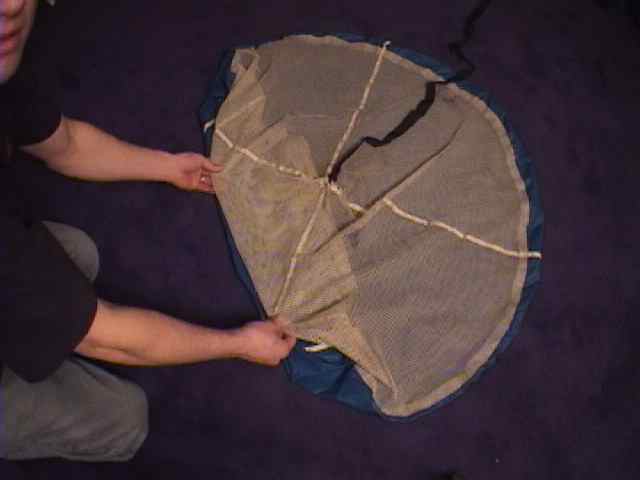
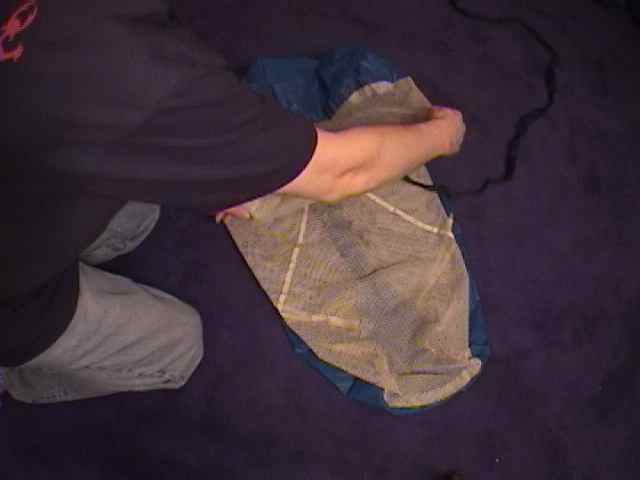
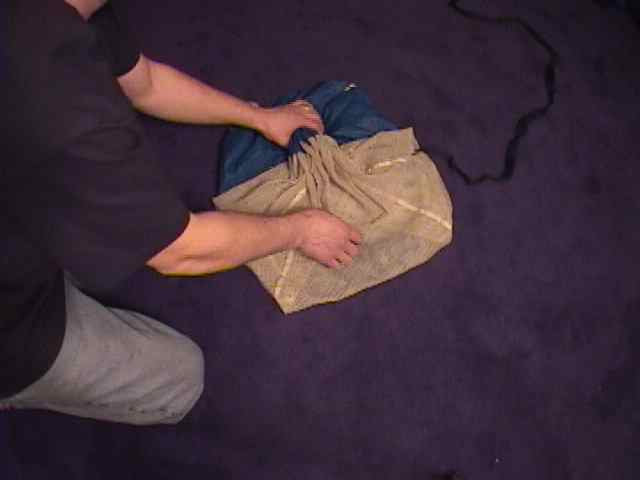
STEP 4 - Once the bridle is done, create a "nug" under the cap. To do this, reach under and grab the cap
and use the end of the bridle stack along with the gathered seam in the center to create a mass of material
that can be grabbed through the cap. This creates a "nug" to grab for deployment.
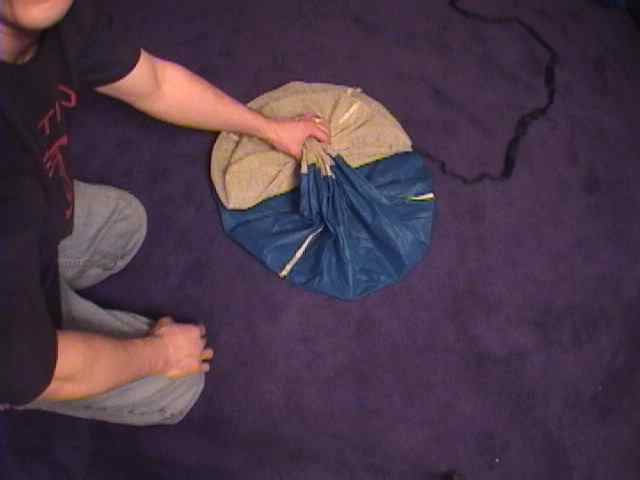
It is important to include a small portion of the bridle stack in the "nug". This ensures that the bridle will be
extracted from the BOC on deployment. As on any stowed PC with a pin rig, you may need to leave
enough bridle slack outside the mushroom to prevent the pin from pulling before the PC leaves your hand.
Because I do not like having much slack outside my mushroom, I personally s-fold it in the mushroom
but I am very careful to make sure the part of the bridle stack in the nug is straight and easy enough
to pull out that it wont pull the pin.
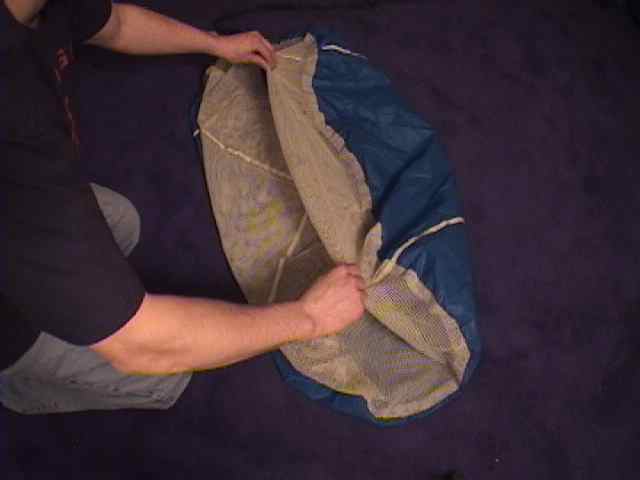
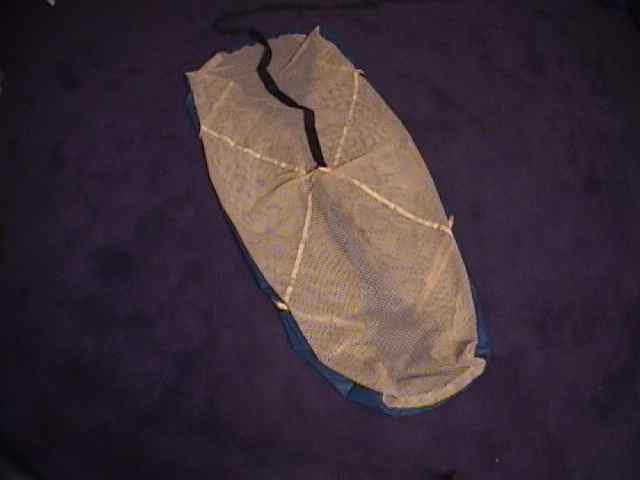
STEP 5 - Once the "nug" is in hand, pull the Rip-Stop into a cylinder shape.
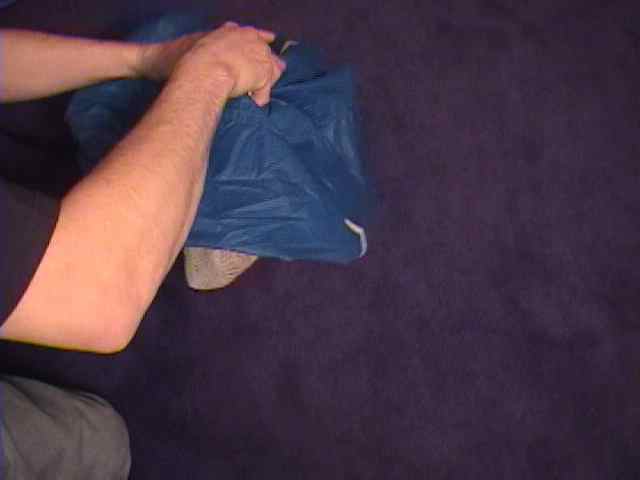
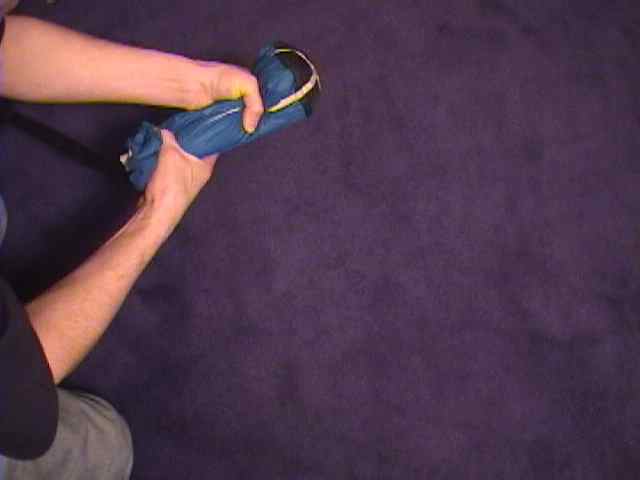
While holding the cylinder, if I turn it over, it looks like this.
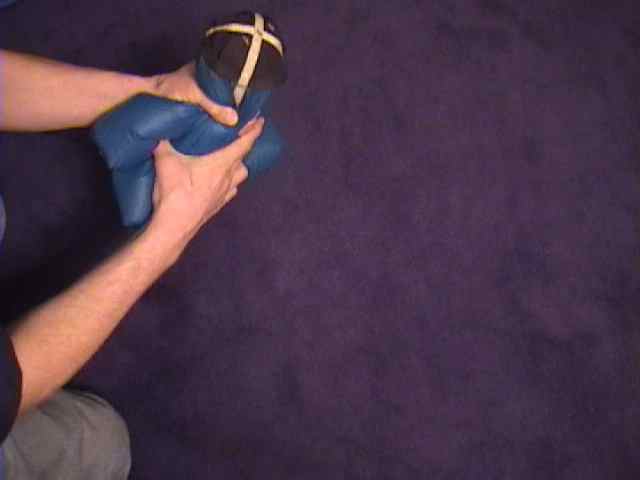
STEP 6 - Holding the cylinder, insert it into the BOC pouch. Ideally there should be a fat, dense "nug" to grab.
NOTE: Be sure you are comfortable with how tight the PC fits into the BOC using this method.
I recommend only using pilot chutes WITHOUT a handle for the Super Mushroom. The primary reason for
this is because, in theory, the center-line could somehow get wrapped around a handle. I only use handles
for smaller PCs intended for longer delays in which case I do not use the Super Mushroom anyway.
This PC pack job does take a few minutes and a flat surface.
You can also pack a Super Mushroom while holding it in the air, however it turns out a bit messier.
The degree of sloppiness may affect its consistency. If you do choose to do it this way, you may want
to pull the center-line up halfway through the gathered seam to divide it into two smaller lengths.
I hope this helps you out.